How to build a skateboard with little skill, I mean very little.
So I got a nutty idea one day while cruising the CD bulletin boards. Somebody brought up the topic of cutting out their own shape from an uncut blank. My wheels began to spin…

How to build a skateboard with little skill, I mean very little.
Words & Photos: 5tall
So I got a nutty idea one day while cruising the CD bulletin boards. Somebody brought up the topic of cutting out their own shape from an uncut blank. My wheels began to spin. It was always something I wanted to do, dating back to when I was a little grom. Now was the time. I figured I could kill two birds with one set of power tools. I would procure the needed pressed maple and in turn write about the trials and tribulations of cutting out your own board. It was an idea of sheer brilliance, I convinced myself and I bring to you my experience of the whole ugly process. From birth to the final product, I’ll lay it all out for you. I mean how hard could it be? Well considering I am a complete tard when it comes to power tools you should be able to draw your own conclusion. So let’s begin, shall we.
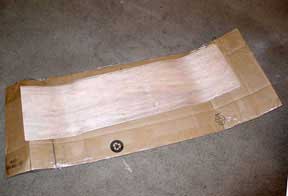
 For the wood I figured I should go top shelf, Jim Gray. He runs the works at Acme and turns out quality product. (We sell blank decks here on CD!) Not only for his own lines of decks, but for countless other independent companies. His wood is grade A in my book, made here, and totally rules. I contacted Jim regarding my dastardly scheme and he was more than happy to oblige me. One stipulation being I finish my pet project with all my digits. I love a challenge, so I agreed. And very shortly my doorstep was greeting by a couple of his uncut decks. I kicked my heels with glee as I imagined the possibilities that lay ahead. I could make almost any shape I wanted. Crazy side cuts, gnarly 80’s style fish tails, a hammerhead nose. On one of the blanks I opted to go with a basic shape. I had an Element board lying around so I threw it on top of one of the uncut decks and traced it out. It looked good so I figured I go with that one first when it came down to cutting time. The next one might be saved for a gnarlier shaped to be determined.
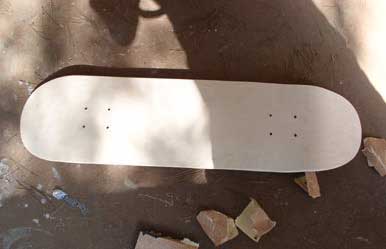
The basic shape came out pretty decent. I used a jigsaw I borrowed from work and I hand sanded the edges with 80 grit paper to round them out. I then drilled the holes using the same hole pattern as the Element board. The total time for this deck was about an hour and a half. I would’ve used an electric sander, but I didn’t have one available. With my hands exhausted, I bolted my trucks on and was pleased with the results. The tail looked a little narrow for my taste, but that’s because I cut one side a little bit too deep and had to compensate on the other side. Regardless of the cutting mishap, the deck came out decent for my first attempt. And after a test ride at a local park, it gets thumbs up. Now for the bad news.

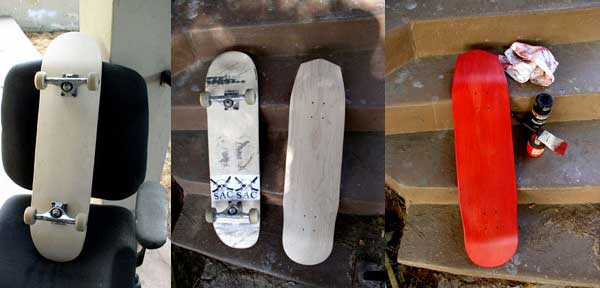
I wanted to get a little more creative for the next board. Something Tim from Five Points Skateboards would be proud of. I drew up a design on the computer and then printed out a template. It was a shovel type nose with some side cuts towards the tail. By this time I felt pretty cocky with the success of the previous board, so I figured I could do no wrong. I would soon find out how wrong I was. I traced out the shape on the wood and began to cut with something crossed between reckless abandon and a Bob Vila type confidence. As the saw chewed those seven layers to bits I noticed I totally fucked up one of the rail edges. I wanted to cry. But it didn’t look too deep and I didn’t want to give up so easily. So it was back to work to swipe, uh I mean borrow an electric sander. I took a few days off. The cutting mishap had knocked me down a few pegs from a Bob Vila to that dipshit that Tim Allen used to play on that one show. When I finally came out of my haze, I was ready with sander in hand. I went to work, sanding and shaping, shaping and sanding. Then I got up to pee, but then it was back to work. About thirty minutes later it stood before me. The tactical cutting error I had made was gone. The nose, which was a little crooked before was right on. And the tail and side cuts looked awesome. I fucking did it! I was so stoked; all that was left to do was drill the sucker. This took no time at all. So now all that was left to do was set it up. I was still riding the one I had made a week before. I noticed I got some premature stress cracks. I forgot to seal it with something. I didn’t want my latest masterpiece to accept the same fate so it was time to go back to work and steal, uh I mean borrow some stain and polyurethane sealant.

I went hunting around in the paint area of my shop and came up with a can of red stain. What a score, blood red stain! And I also came across a spray can of polyurethane spray. I tested the stain on a piece of scrap wood and the color was perfect. So I hurried home to put the final touches on. I used a brush to spread it on and I rubbed it in with a rag. Once that was done, I sprayed both sides with the sealant. And presto, I was finished. I was so proud of my handy work, I still had all my fingers, and I had a board my friends will drool over. So I guess my next step is to start custom shaping some boards. I found it wasn’t too hard if you practice a little patience, something I’m in short supply of but learned how to manage it through the duration of this project. And it was fun just to create something from scratch, Okay it’s not like I pressed the wood, Jim did, but I did the rest and I had an awesome time doing it. This would be a great father and son, weekend project for those of you with little ones that skate. I don’t have kids, just a weenie dog that showed little interest while I worked on the porch. Thanks to Jim for the wood and to my place of employment for not noticing the missing tools, I swear I’ll return them.

